

I love making DIY holiday gifts for friends and family. I can put a personal touch on items, make something meaningful, and learn a new craft too. It's a win-win.
I get a lot of my crafting know-how from my mom, who set the bar high early by making things like puppet invitations for my first birthday (seriously: little wooden puppets with the party details written on their stomachs) and kid-sized dolls for my second. In addition to deploying her as a secret weapon at my own kids' parties (if fed properly, she'll even stay up most of the night sewing superhero capes with you!), I took advantage of her visit earlier this month to get a quick tutorial on holiday wreaths, which she's been making for years.
Supplies:
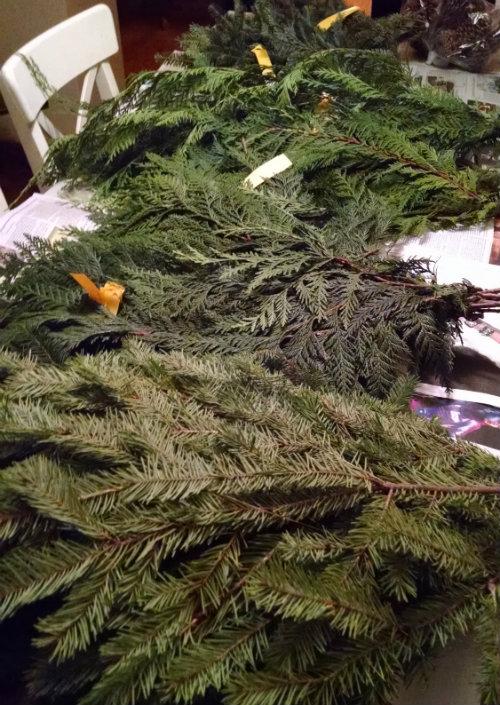
Evergreen boughs. You can use any kind of evergreen, although watch out for hemlock and spruce which will drop needles indoors. We bought clumps of cedar and douglas fir at a local garden store; cedar has a nice, flat look while the douglas fir is pretty chunky.
Frame. We bought wire frames at a craft store, to serve as the base. Tip: you can also just buy pre-made wreaths to embellish. We were trying to be purists for this project, so did everything from scratch.
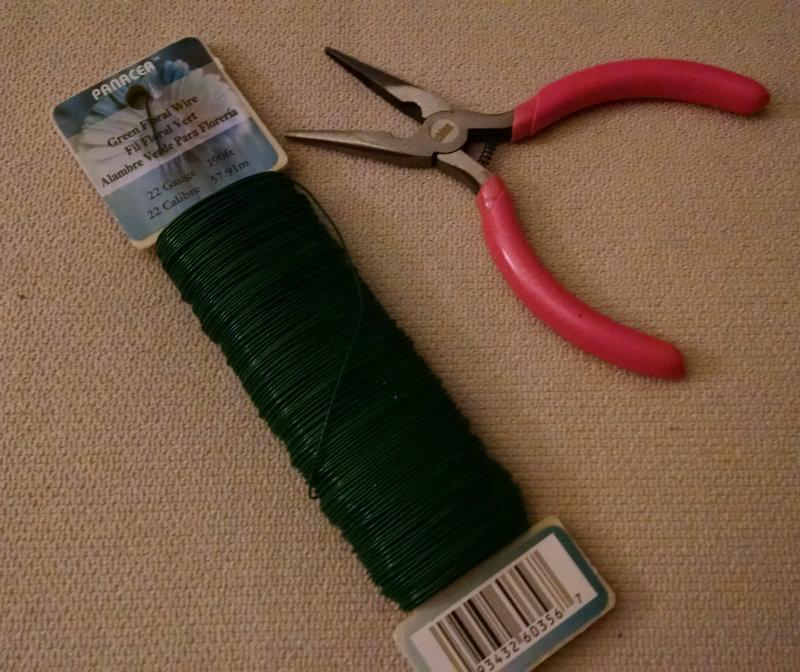
Strong, pliable wire and wire cutters. You'll bind the greens onto the frame with the wire. And no: scissors or garden schears won't cut wire. You really do need wire cutters!
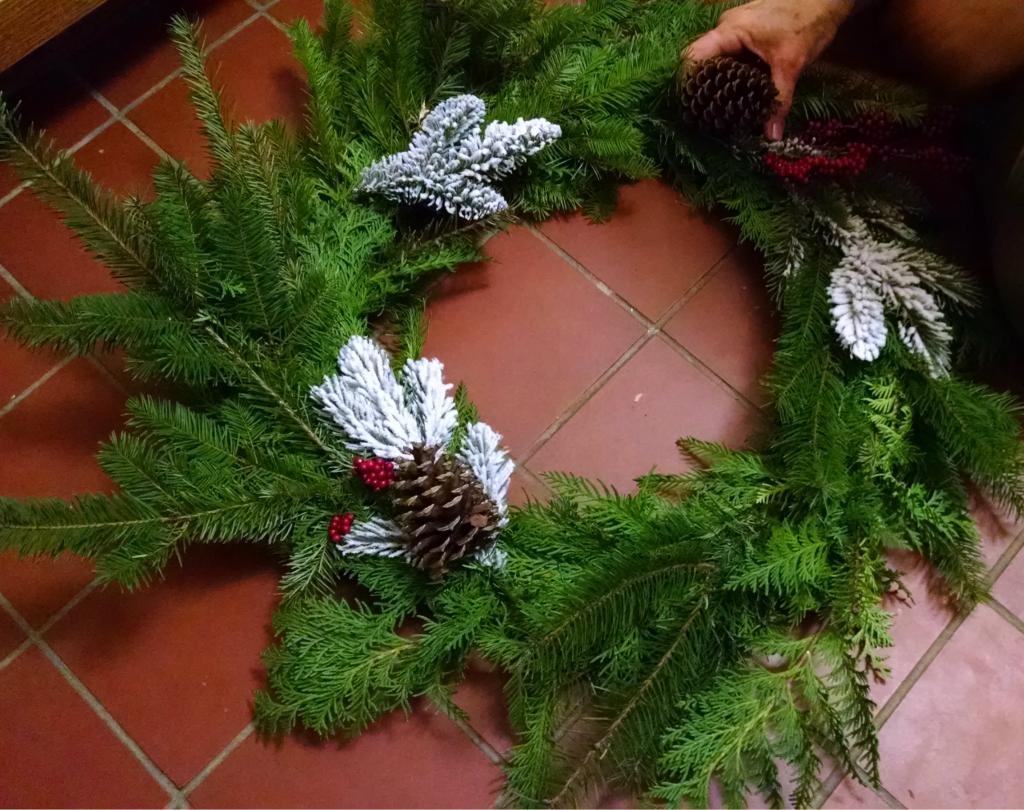
Embellishments. You can add anything from bows, to ornaments, to decorative flowers and berries. Chances are you have a lot of this kind of stuff lyingaround the house, although investing in a nice bow can add some pop.
Directions:
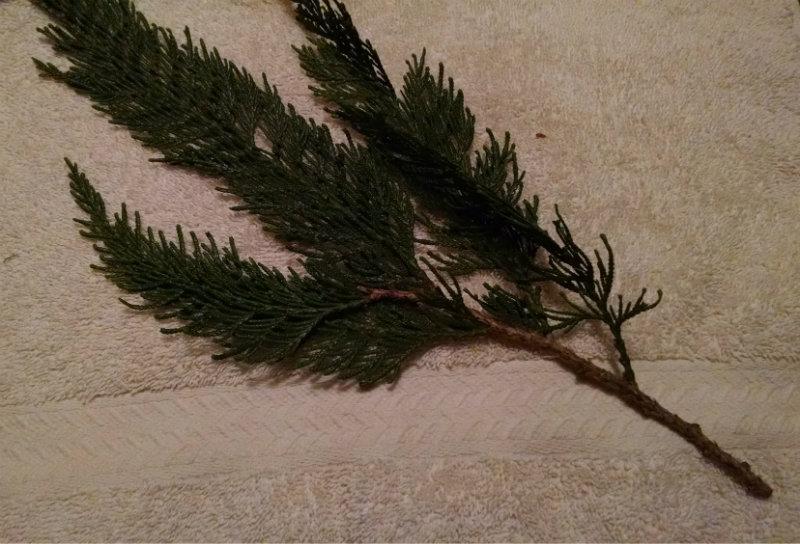
Step 1: Cut your greens. Cut your greens into 4-6" lengths. You're going to create small bundles of greens, and wire them onto the frame one at a time. Note: you can create bundles of one type of evergreen, or mix them up. My mom made some really nice bundles with multiple types.
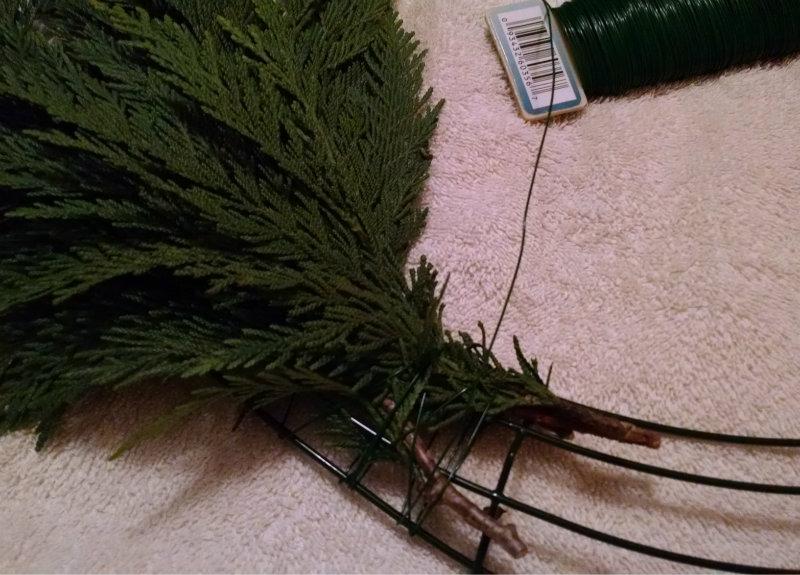
Step 2: Wire the greens onto the frame. Hold the first bundle onto the frame, and wrap the wire around the end of the cuttings 3 or 4 times, affixing it tighly. Lay your second bundle over the base of the first, covering up any stems that might have been showing. Wire it down. Continue all of the way around the frame. Life the first bundle up to wire down the base of your last one, soyou don't inadvertently wire the last bundle right on top of the top of the first. Remember to tie the bundles down very tightly. You're not going to cut your wire at any point; it's a continuous thread throughout the piece.
When you've finished tying on all of the bundles, hold up the wreath and see how the greens fall. At this point you can circle back and tie down any sections that are drooping. You can also add additional greens if needed; for example, my mom applied a second type of chunkier greens onto the first ones, which laid pretty flat.
Add bows, ornaments, candy canes, etc. Use your wire to create little ties to affix them to the wreath. We made red bows, and used a variety of sparkly leaves and berries.
Keep checking your final look by holiding the wreath up against a wall. You really can't go wrong; simpler wreaths are beautiful, and totally tricked out ones are too. If things start sagging the next day, just tuck them in / wire them on. It's all good.

Enjoy!
A few final notes:
- My mom and I tried two different approaches. She wrapped longer boughs around the frame in multiple layers, eventually achieving a thick look, while I used bundles. They seemed to take just about the same amount of time.
- The boughs can be sticky, and needles can be pokey. Wear gloves if either of these things bother you, and consider covering your table with newspaper too.
- Evergreen boughs can be used for a wide variety of additonal projects, from centerpieces to grave blankets. Try some of those out too; you'll use lots of the same techniques!
Related Posts


The views and opinions expressed in this post are those of the author(s) and do not necessarily reflect those of MomsRising.org.
MomsRising.org strongly encourages our readers to post comments in response to blog posts. We value diversity of opinions and perspectives. Our goals for this space are to be educational, thought-provoking, and respectful. So we actively moderate comments and we reserve the right to edit or remove comments that undermine these goals. Thanks!